Saturday, September 30, 2006

Fun with Arctangent

Still not much is getting done over here.

I continue to plan and draw out various faces and angles for the PVC center foot shells. Luckily, I can remember some basic trigonometry, as I've had to rely on it several times throughout this project.

This time around, I'm calculating angles of adjoining edges, whose lengths are known. Arctangent (and my scientific calculator) to the rescue!

Due to other commitments, I probably won't have anything new to report until Tuesday at the earliest. :(

Thursday, September 28, 2006

Started Thinking About Center Foot Shell

This really doesn't qualify as building, but while I'm waiting for my pocket vents and side vents to arrive, I'm thinking about the feet. I have the budget feet for the two outer feet, but I don't have anything for the center foot.

Vince Sanchez made his center foot from MDF, while Mike Senna made his from PVC. I'm leaning toward the PVC, since the center foot is prone to taking a beating. The center foot will lead, and is the most likely part to run into things (or have things run into it), and I think the MDF might dent or break. I printed the blueprints and am studying how to approach this build.

I hope those vents show up soon so I can put this on the back burner again! :)

Tuesday, September 26, 2006

Minor Repairs

Today I worked on some minor repairs involving my most recent nemesis, silicone.

On the way to R2LA IV, I heard the distinctive "thump" of parts falling off my droid while en route to the event. Sure enough, two of the cylinder wedges had fallen off. I did a quickie re-silicone of those parts, and tonight the tape came off and they seem to be holding.

I still haven't been able to get the dome panel for the front logics to stick, but I'm trying again.


Sunday, September 24, 2006

R2LA IV.1

The merriment continued into today, as some more building got done.

Rick Thames, who flew out for the event from Illinois (along with all his R2 belongings) made great progress on his speed controllers and drivetrain, with a big helping hand from Mike Senna, Michael McMaster, and William Miyamoto. Russell Rucker and I watched from a safe distance.

R2LA IV!

What a party! Where to start?

A ton of builders came to Mike Senna's, to celebrate R2LA IV.


Among other things, we had what we believe to be the world's largest Cantina Dance chorus line, with a dozen interactive R2s participating! You have to see the video on YouTube.


There were a ton of droids in various stages of completion. Mine was somewhere amongst the throngs.


I was honored and humbled to win the "Michael J. Senna R2LA IV Droid Builder Award of Excellence 2006" trophy. Thank you Michael McMaster and Mike Senna!


And last but not least, Christie showed up, and posed with all our droids. Artoo will never wash his shoulder again.


Man, I can't wait until the next get together!

Wednesday, September 20, 2006

Temporarily Installed Front Logics

I'm running out of time before R2LA IV to get the front logics installed. So, I cheated... I used strapping tape and taped them in from behind(!). Not very stable, although it's holding so far.


The rats nest of wires inside the dome is also an embarrassment, I need to tie those down somehow too.

This is probably my last update until R2LA IV on Saturday (to which I'll be running a little late), as I don't have much more I can get done before then.

Tuesday, September 19, 2006

Mounted LDP

Until now, the Large Data Port has been just sitting loose on the frame. Tonight I used some 3M foam tape (2 layers) affixed to the underside of the LDP, to (semi-)permanently mount the LDP into its slot in the skins and frame.

Monday, September 18, 2006

Finished Wiring Up Switches, Batteries, Front Logics

Today I was able to get the rest of the dome electronics wired up. The whole mess is now self-contained in the dome.

I have the front logics pulled out for the moment, since I'm still waiting for silicone for the blue dome panel for the front logics to set completely. Everything is working, but I am a little concerned about the large number of connections I have in there. Each is a potential point of failure.


I am waiting on a planned run of rear logics, so those are still missing from the back of the dome.

Sunday, September 17, 2006

Finished PSIs, Rats Nest Almost Done

Today I was able to finish wiring up the PSIs. I gave them a test inside the dome.


I have quite a rats nest of wires that I'm creating, but amazingly, it all works (for the moment, at least). I just need to permanently hook up the dome switches and batteries.


I'm hopeful that the front logic panel piece will be secure by tomorrow and that I can start working on getting the bezels to fit into the dome.

Saturday, September 16, 2006

More Dome Electronic Work

More of the same, with today's focus on the PSIs.

I bought some new connectors from Fry's today. These ones had wires already in them, so they are much more reliable. With them I'll be able to disconnect subsections of the dome electronics independently of the rest.

I got the yellow/green PSI connected, but I inadvertently snapped a solder joint on the PSI PCB for the red/blue PSI, so I need to fix that tomorrow.

In the saga of reattaching the front logic dome panel, believe it or not, the JB Weld did not hold the front logic panel in place on the dome, even after curing overnight. I can only attribute that to trace amounts of silicone or other contaminants on the surface of the dome and/or panel. So I sanded, cleaned with acetone, wiped down, and I am giving another go with silicone. This is an endless loop...

Friday, September 15, 2006

Mounted PSI Housings, Cut Front Logic Wiring

I spent most of the day today getting the PSI housings mounted.

I cut small PVC stands, and sanded them to the profile of the PVC pipe they will support.


Then, iteratively fitting everything together, I used PVC glue to affix the stands to the housing base, and finally, the PVC pipe to the stands.


I also attached the permanent wiring for the front logics.


I gave up on silicone for now, it isn't drying for some reason. I had to resort to a dab of JB Weld to reattach the front logic outer panel on the dome. Oh well (yet again).

Thursday, September 14, 2006

Dome Ring Work

For the first time in a long time, I had the dome ring separated from the rest of the dome, in order to do some drilling for the PVC stands for the dome electronics.


I drilled holes for both front and rear PSIs, the front and rear logics, the PSI board harness, and the battery pack. Currently, the PVC mounted onto the frame just represents the bases of the stands. The stands will be built up shortly to support their corresponding parts.


I finished building the mount for the PSI board, so I reattached the ring to the dome, and gave that a test fit.


I still have to build up the PSI stands and front logic harness, and solder the power bus together. My connectors from yesterday proved to be too flaky, so I will have to devise another strategy (think stranded wire and electrical tape...).

Wednesday, September 13, 2006

Wired Up PSIs

Adventures in soldering. I managed to more or less wire up the front and rear PSIs. This involved 18 leads to solder (including the LED daughter cards), and I am bad at soldering.


I used connectors for the wires going out to the LEDs, so I can disconnect them without having to take everything apart. I think these are the most likely point of failure, as they are already acting flaky. Hopefully I won't have to abandon them.

Tuesday, September 12, 2006

Reglued Dome Panel, Cut PSI Board, Worked on Dome Electronics

I started the day by regluing with silicone the dome panel that surrounds the front logics. I had removed this panel earlier to do some light filing on it and the corresponding area on the inner dome. Once this is dry, I hope to work on securing the front logics in place.


Next, I cut Dan's PSI board. The main board has two tiny daughter cards that are cut from it. These little daughter cards support the LEDs.


In the evening I worked on laying out the dome electronics. I drew up some plans and schematics, and switch operations. This part is taking longer than I thought it would. It didn't help that I had the Star Wars DVD playing in the background either.

Monday, September 11, 2006

JB Welded in Right Rear Coin Return

Man, am I ever lazy. I had big plans to work on the front logics. Instead, all I managed to get done was JB Welding the right rear coin return into place. I better shape up!

Sunday, September 10, 2006

Worked on Front Logic Harness, JB Welded Left Rear Coin Return, Tightened Up HPs

Today I glued together the PVC sides of the front logic harness with PVC glue.


I decided to give up on using silicone for my coin returns on the back door, and have chosen JB Weld instead. Hopefully this will secure the coin returns for good.


I also added a small piece of felt (using double-sided tape) to the inside of each holoprojector. The HPs were fitting a bit too loose for my taste.

Saturday, September 09, 2006

Recut Front Logic Harness PVC Side Pieces

I didn't get much done today due to errands and laziness.

I did manage to recut the PVC side pieces of the front logic harness to the proper size. I still need to cut some supports to support the bezels in the harness before I can glue the mess together.

Friday, September 08, 2006

More Goofing Around with Dome Electronics

I was supposed to glue together my PVC harness for the front logics today. Unfortunately, I am a moron, so that didn't happen. I cut the PVC to be the exact length of each edge of the box that surrounds the logics. That means that the sides meet at corners, not complete edges. I should have consulted a kindergartner.

So, in my disgust, I decided to wire up my USB/Serial adaptor that arrived from Pololu.com today, and have some fun changing the message text on the front logics. Apparently R2 now thinks I am "great." For the moment, at least. :)


I tried and tried to get a couple of different USB/Serial adapter drivers to work with the Mac, but I never saw any relevant /dev/tty devices, so I gave up for now and resorted to using my PC laptop from work. Hopefully I'll get the Mac driver to work sooner or later.

Thursday, September 07, 2006

Filed Front Logics Dome Panel, Cut Front Logic Harness, PSIs Arrive

Today I started work on the front logics.

First I pulled off the outer dome panel where the front logics go, as it required a bit of fine filing to get the bezels through.


I cut pieces of PVC that will form a housing around the front logics, inside the dome. I hope to start gluing the housing together tomorrow.

Dan Stuettgen's PSI boards arrived today.


I couldn't help playing with them, and holding them inside my dome. Obviously I need to work on diffusing the LEDs.

Wednesday, September 06, 2006

Discussed Feet & Logics with Mike

Again, no real building today, but some planning.

I met with Mike to discuss a strategy for a drivetrain and internal feet. It looks like if I can find the right aluminum stock, I will be able to fashion feet using that and the aluminum channel that I purchased from Darryl a while back. For now, that's on the back burner, though.

We also discussed dome electronics, specifically the front and rear logics. Mike showed me the front logic harness he built from PVC, so I'll try building one, hopefully starting tomorrow. I still need to do a little bit of filing on the dome to get the front logic bezels to fit.

Tuesday, September 05, 2006

Goofed Around with Front Logics

This doesn't really warrant posting, but since I have nothing else, I started modeling the front logics in the dome to see what filing I need to do to get everything to fit.

The top display fits okay, but the bottom is a bit tight. I think it's the inner dome's crossbar between the top and bottom displays that is the problem, so that will get filed a bit.

Monday, September 04, 2006

Glued in Right Rear Coin Return

This morning I glued in the right coin return on the back door.


The left rear coin return and I are not on speaking terms at the moment.

Sunday, September 03, 2006

Together Again

He may not have a sound system yet, but R2 was singing "Reunited" tonight. What a difference a week makes.


So... what's next? I think I'm going to focus on the dome electronics. I have the Ben/Jason/Dave logic displays (they are great!), and I have Dan's PSIs on order, they should arrive in the not too distant future. I guess I need to start thinking about how I'm going to mount these in the dome. Needless to say, I'll be studying Mike's design.

Saturday, September 02, 2006

Mounted Center Leg Cylinders, Unmasked Power Couplers

Wow, that liquid latex worked well! But I'm getting ahead of myself. First things first.

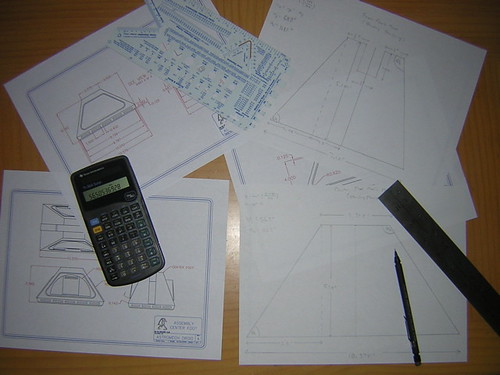
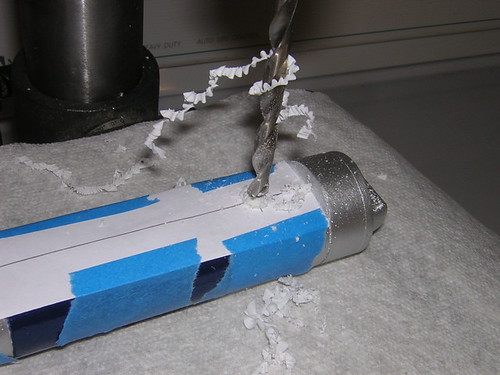
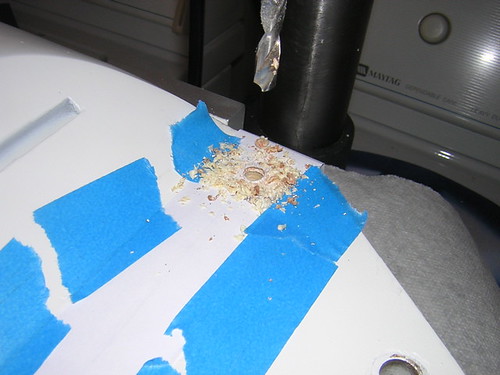
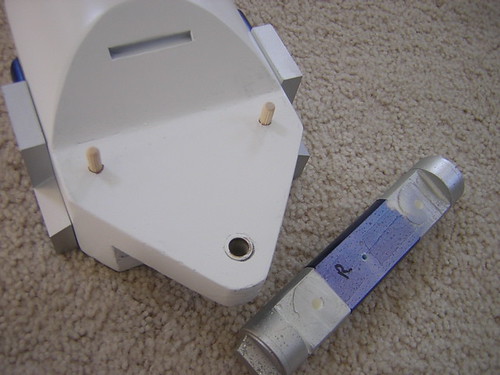
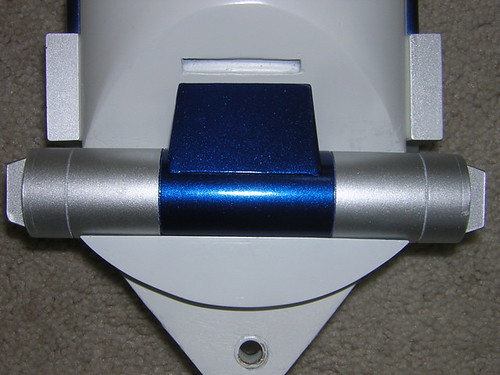
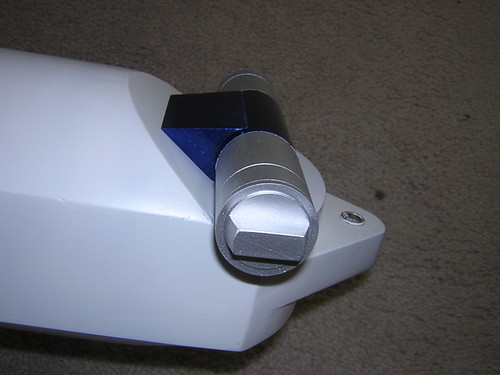
More of the same, I repeated yesterday's exercise for installing the ankle cylinders, this time on the center leg.


While the left cylinder and wedge fit well, the right wedge didn't fit so great. I'm left with either a gap between the wedge and the cylinder, or a gap between the wedge and the leg. My solution? For now, I only have one dowel holding the cylinder in place, and I let the side of the leg support the other side of the cylinder as it "wraps" around the leg's edge (if that made any sense...). The very slight tilt of the cylinder allows the wedge to fit better, and the tilt is not noticeable.


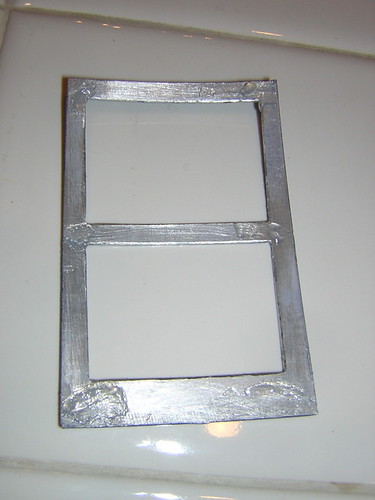
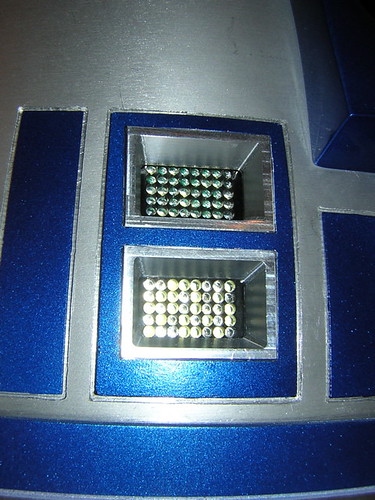
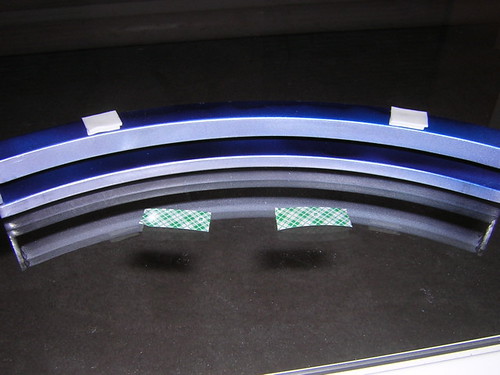
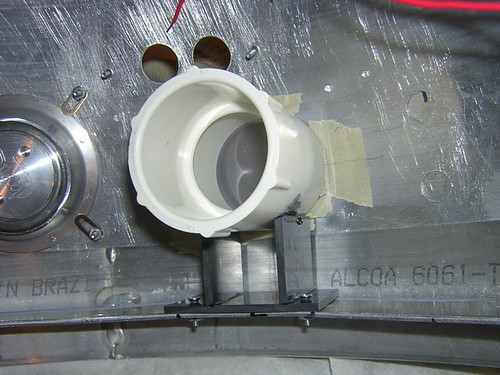
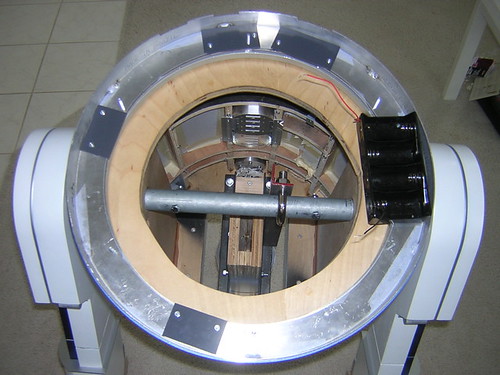
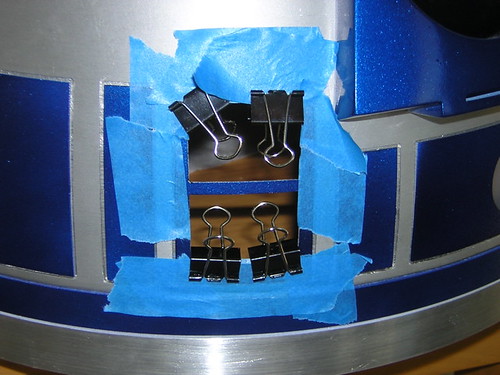
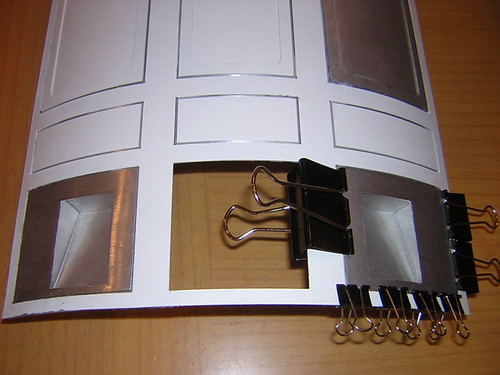
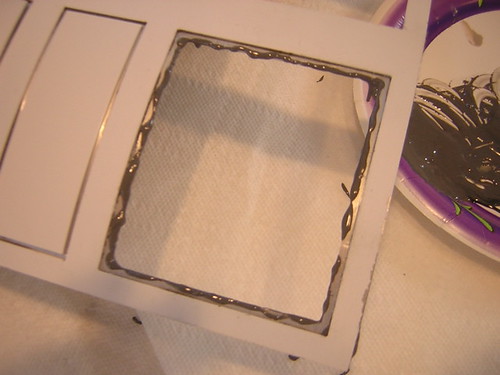
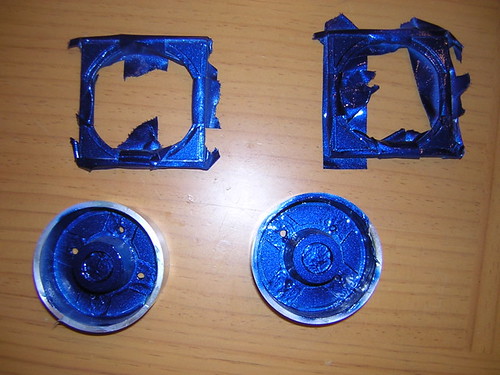
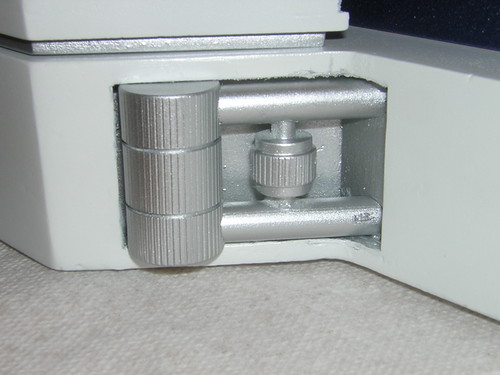
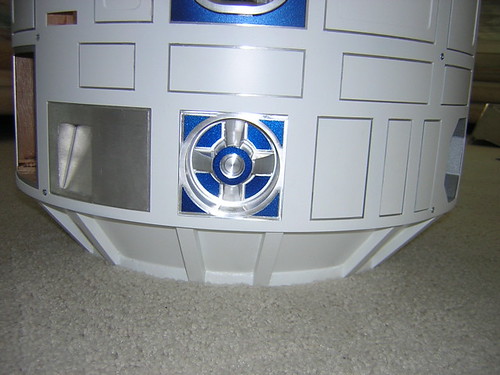
Okay, now back to the power couplers. I really had no idea what to expect from the latex mask. I slowly and carefully unpeeled the latex from the inside ring of the power coupler.


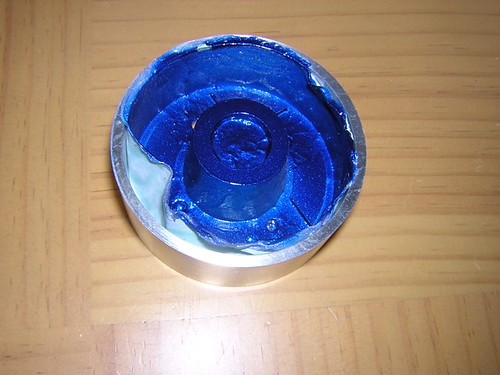
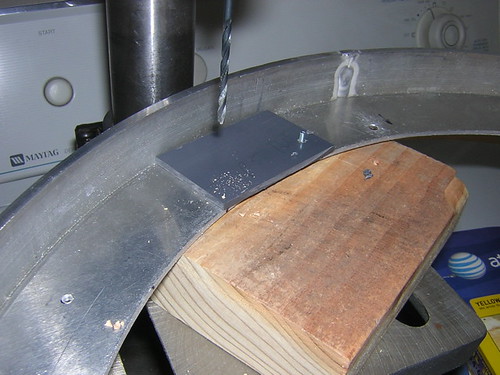
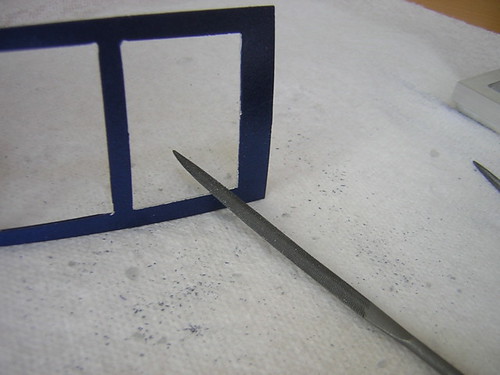
After getting the bulk of the mask out successfully, I used an Xacto knife to trim the edges of the mask on both the main power coupler body, and the power coupler frame.


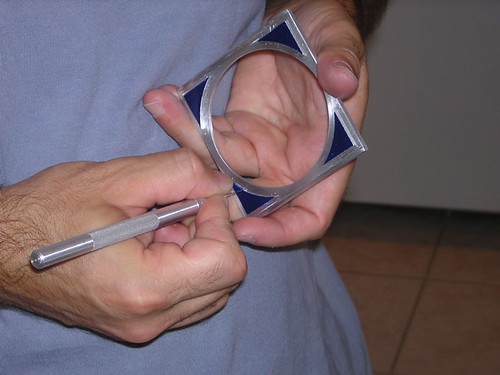
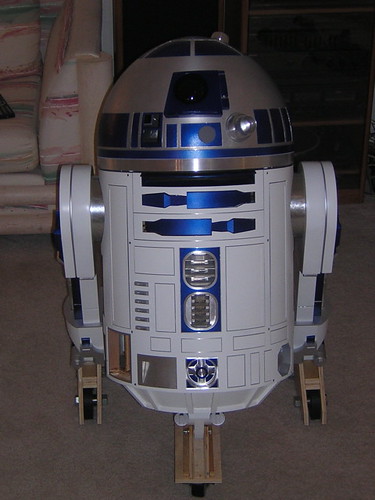
I must say, it turned out really well. I couldn't be much happier. I gave it the usual loose-fit trial.


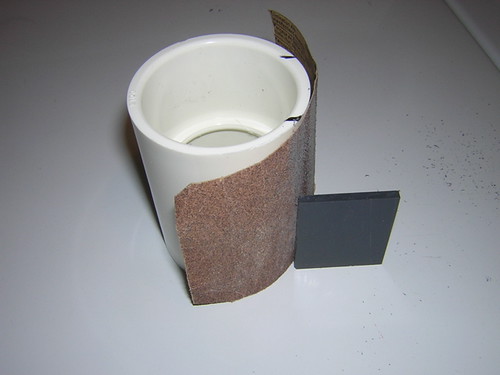
I also did some very minor blue paint touch-up on the booster covers and center leg cylinder wedges.

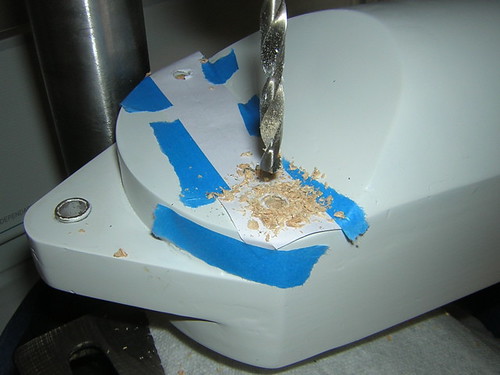
Believe it or not, a second attempt at gluing the left rear coin return still did not work. I finally realized that even an unopened tube of silicone must have a shelf life. The "new" tube I was using was from December 2005, which I didn't think was that old. Nevertheless, I bought a new tube tonight, and this time the silicone seemed to behave better. Here's hoping the third time's the charm.

Friday, September 01, 2006

Reglued Left Rear Coin Return, Trimmed Temp Feet Tops, Painted Power Couplers, Finished Outer Legs

Hmm. For whatever reason, the silicone for the left rear coin return didn't stick. The silicone was from a never-before-opened tube, so I don't think it was bad. I probably just did a bad job. Anyway, I reglued it, and hopefully it'll stick this time.

I had more foot work to do too. I needed to trim about 1/4" off the top of my outer temporary feet, to leave clearance for the cylinder holders that ride above the feet. The other nice thing is that the temporary feet now fit into my budget foot shells, in case I ever want or need to put them on before I have real feet.

I was able to paint the power couplers blue today. Here's where the faith in the latex kicks in. After a few hours of drying time, I couldn't resist just slightly peeling the edge of the latex to see how effective it was. I was happy to see it was doing exactly what I had hoped, shielding the aluminum from the paint. I know this looks like a mess, but that's because the latex was applied thick and unevenly.


Next, I turned to installing the ankle cylinders. I purchased 1"x1/4" diameter dowels to use for mounting the cylinders. I made (yet another) paper template for locating the mounting holes. I taped the template onto each outer resin cylinder, and drilled the cylinder first.


Then I transferred the template to the wooden legs, and drilled those.


I inserted the dowels, and then I mounted the cylinders.


I used silicone to attach the cylinder wedges and holders.


I wrapped up the day by using (what else?) silicone to install the under shoulder details. I'd like these in aluminum, but I didn't want to wait indefinitely for them to be offered. Besides, with silicone holding them in, they should be fairly painless to swap out should I obtain an aluminum set.